Barrier D3
Configuration D3: Barrier with pelvis bumper
Boundaries:
• Rigid barrier
• Impact speed: High velocity
• Arms in 40 degree position
• Pelvis pusher
• Oblique impact
• ES-2re dummy model used 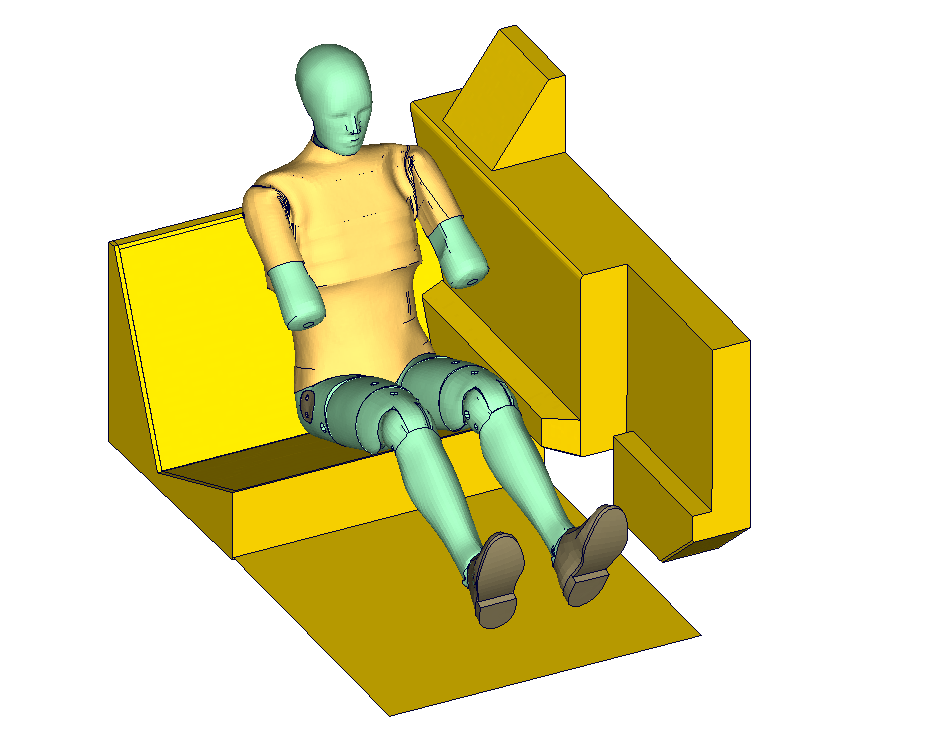
D3 barrier test setup
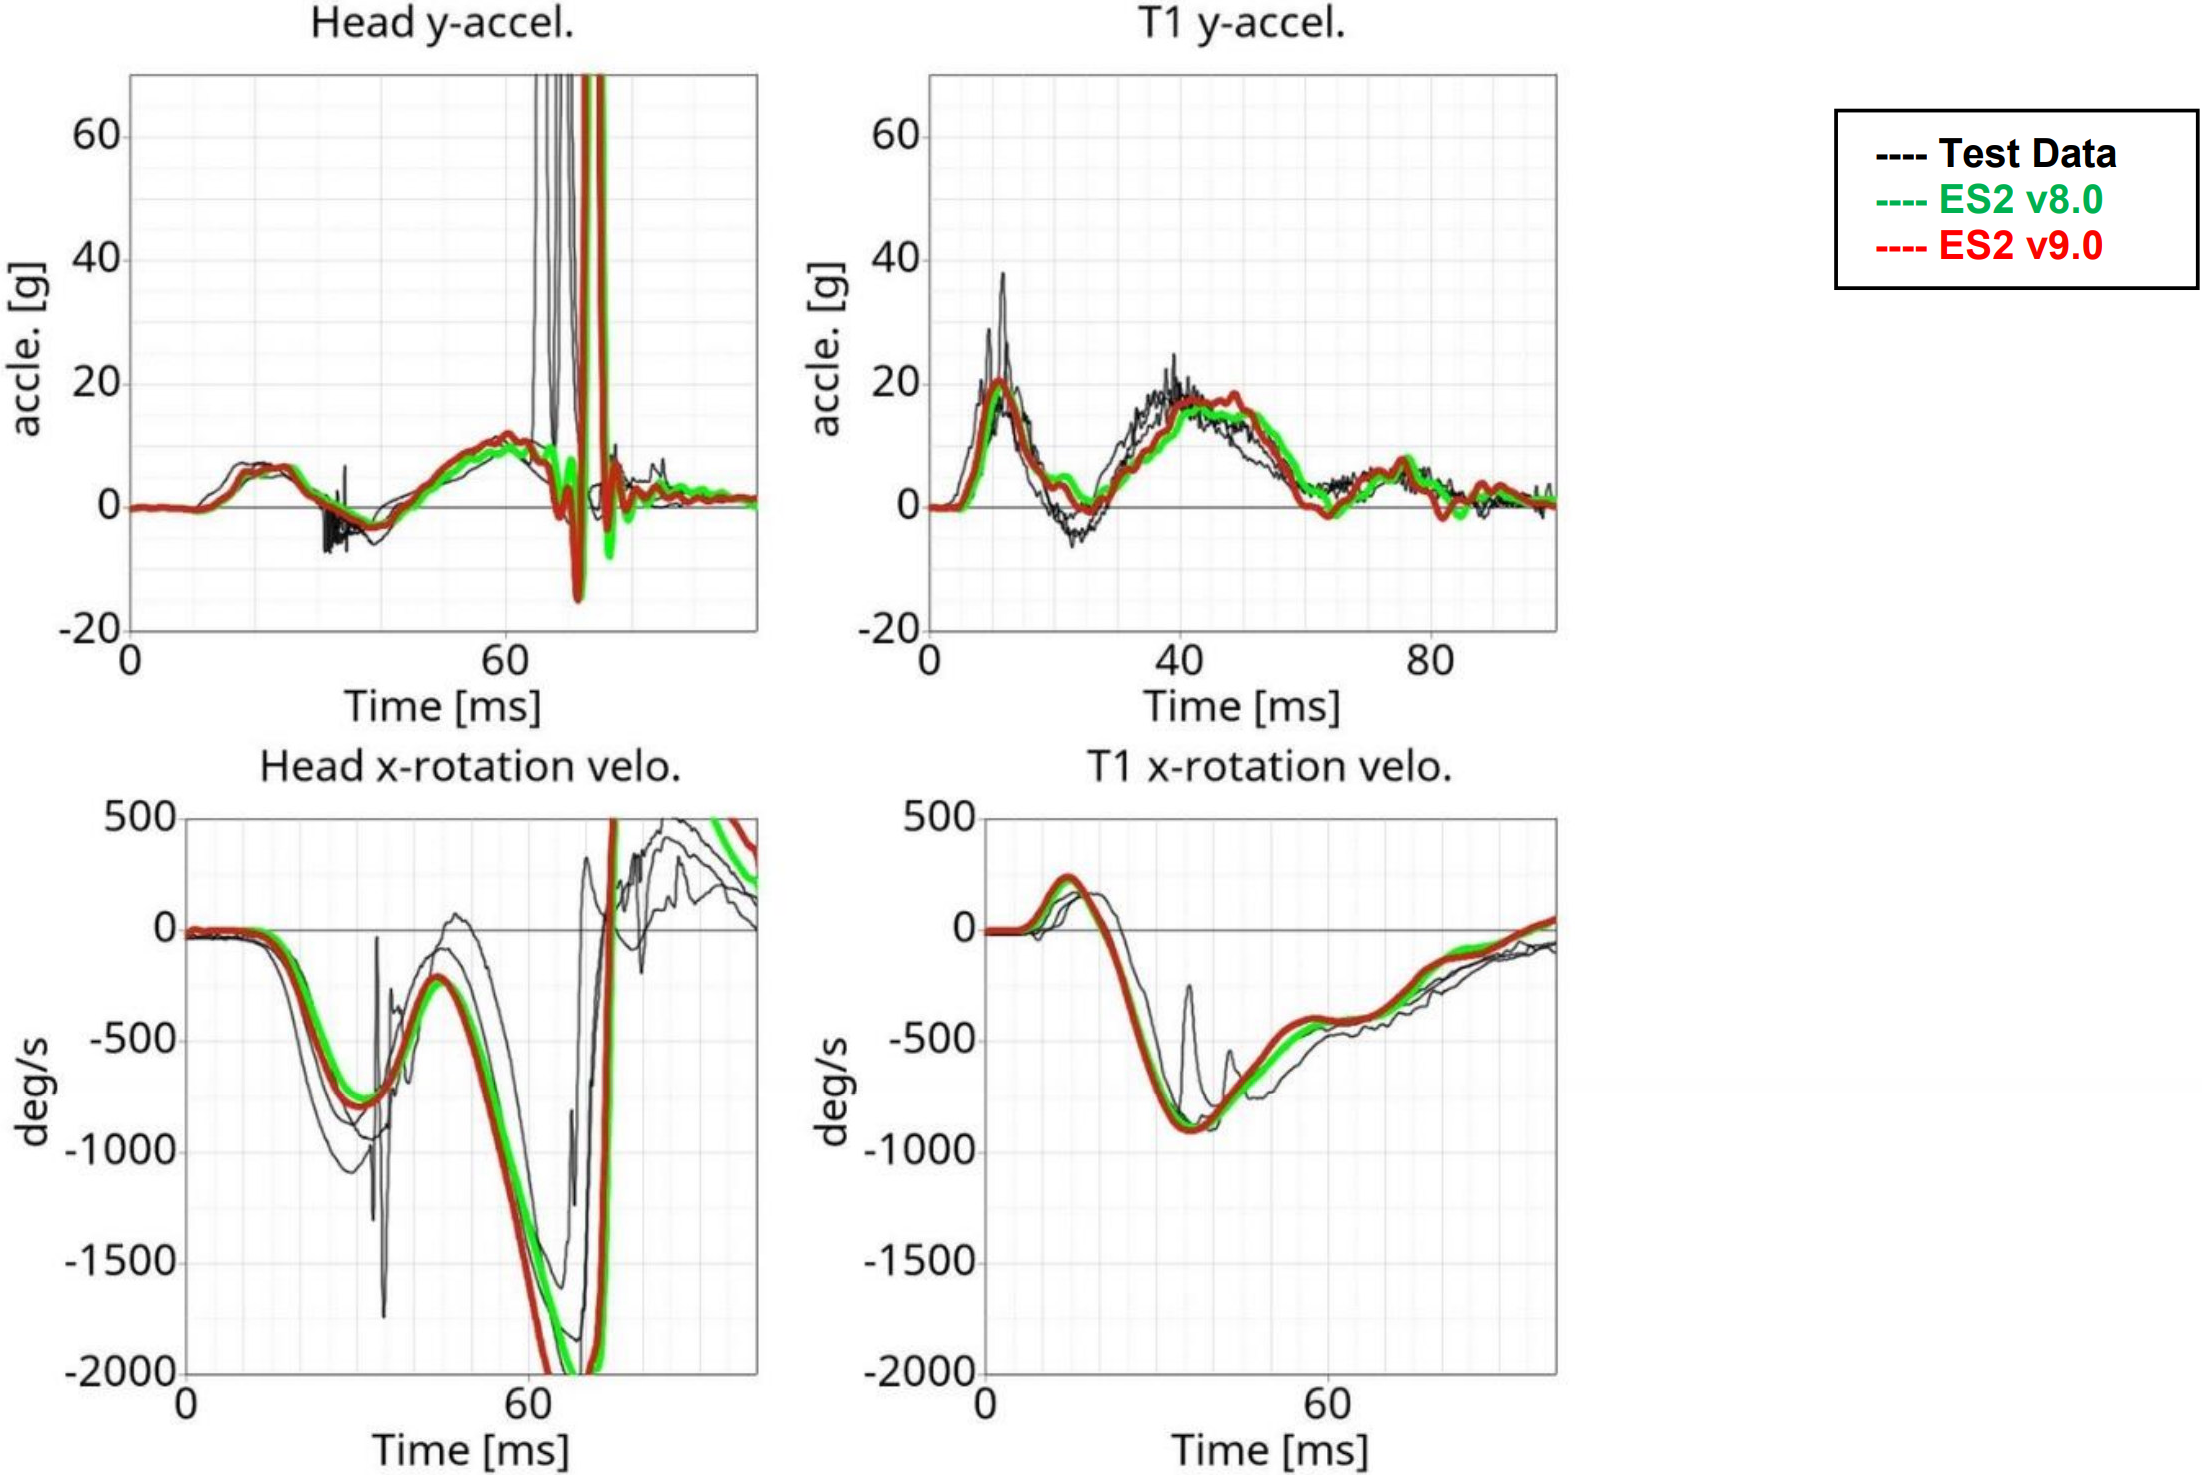
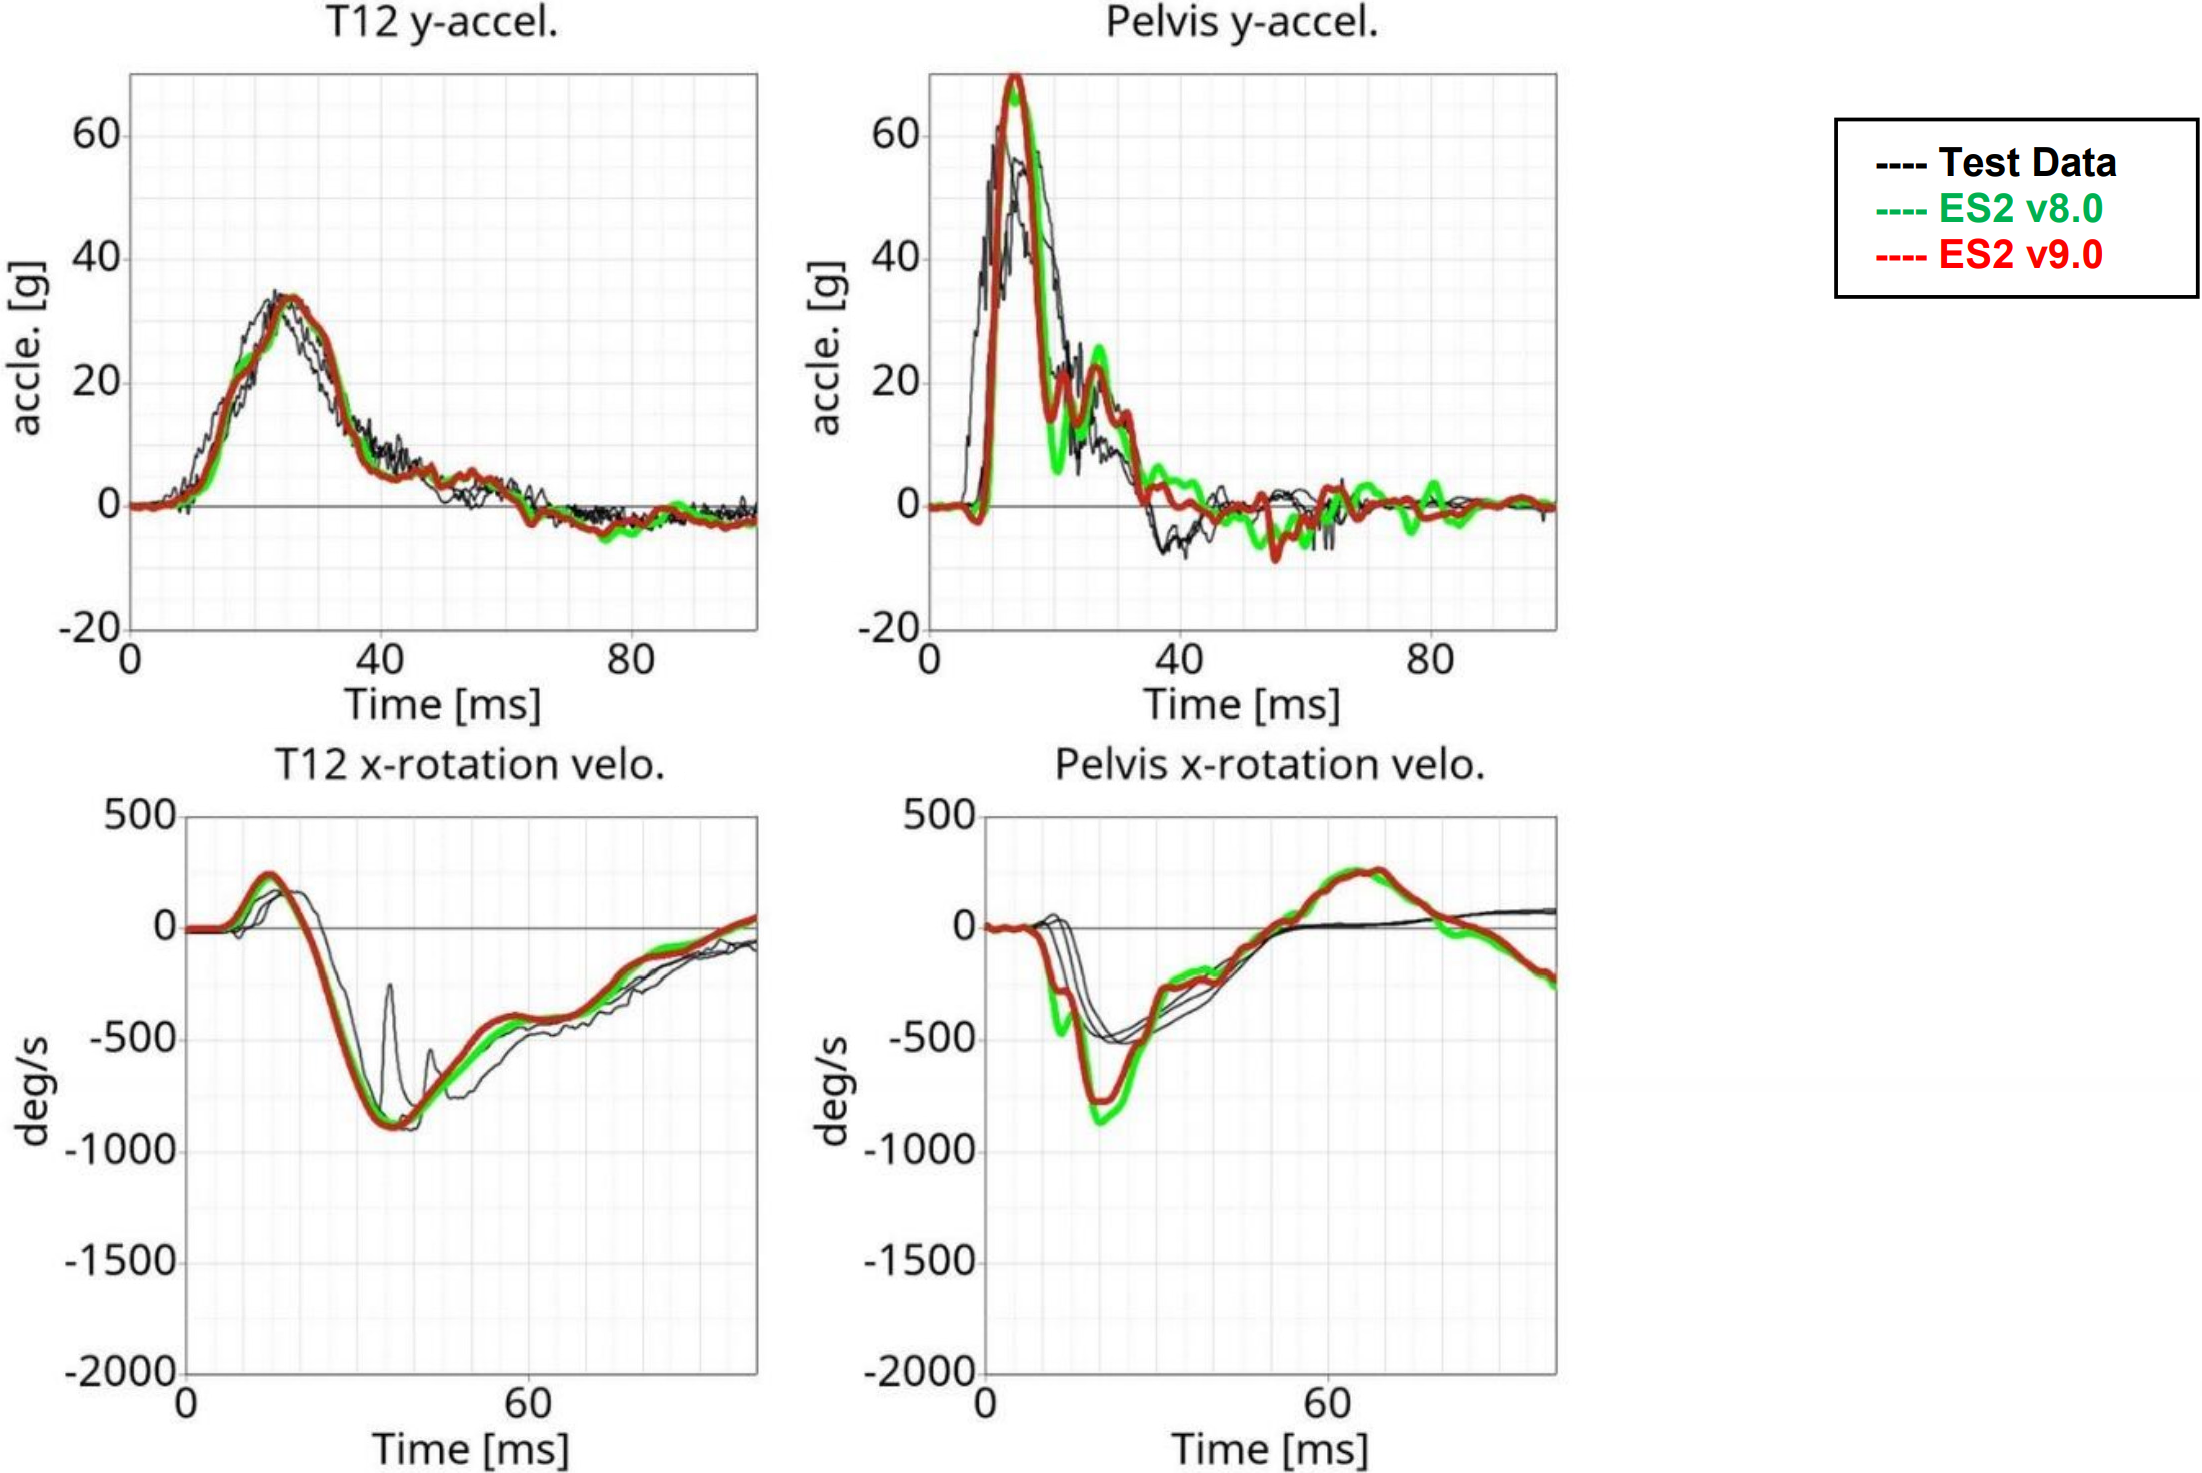
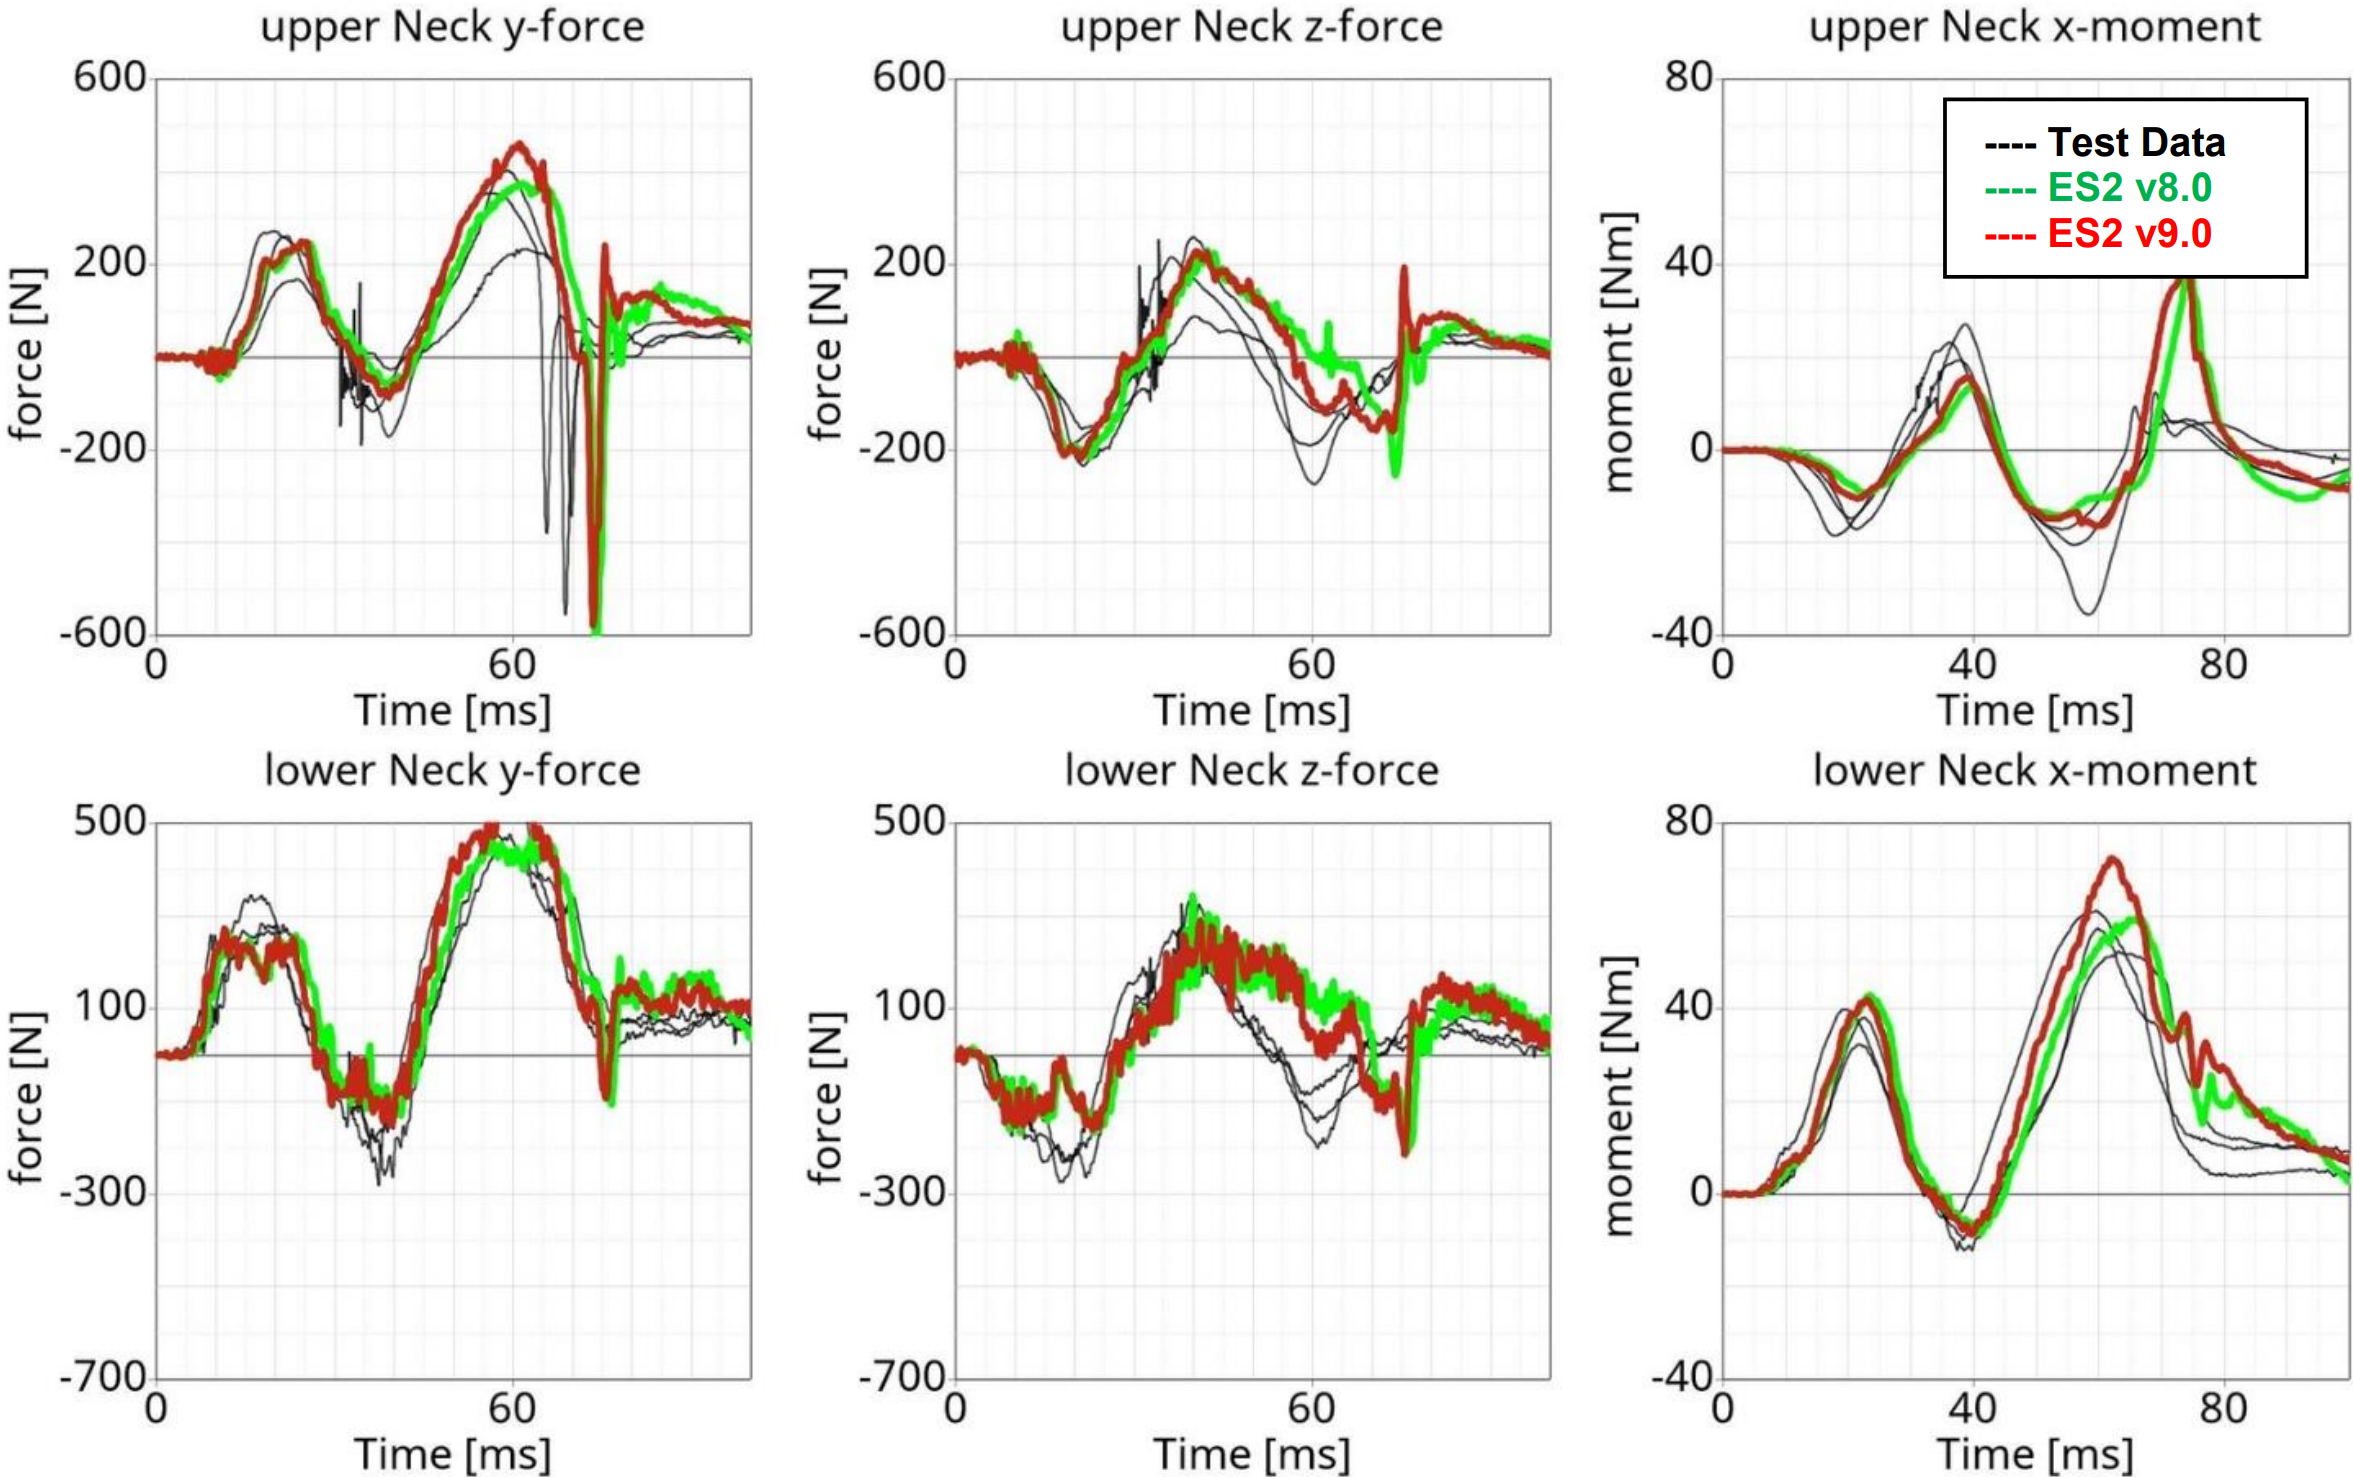
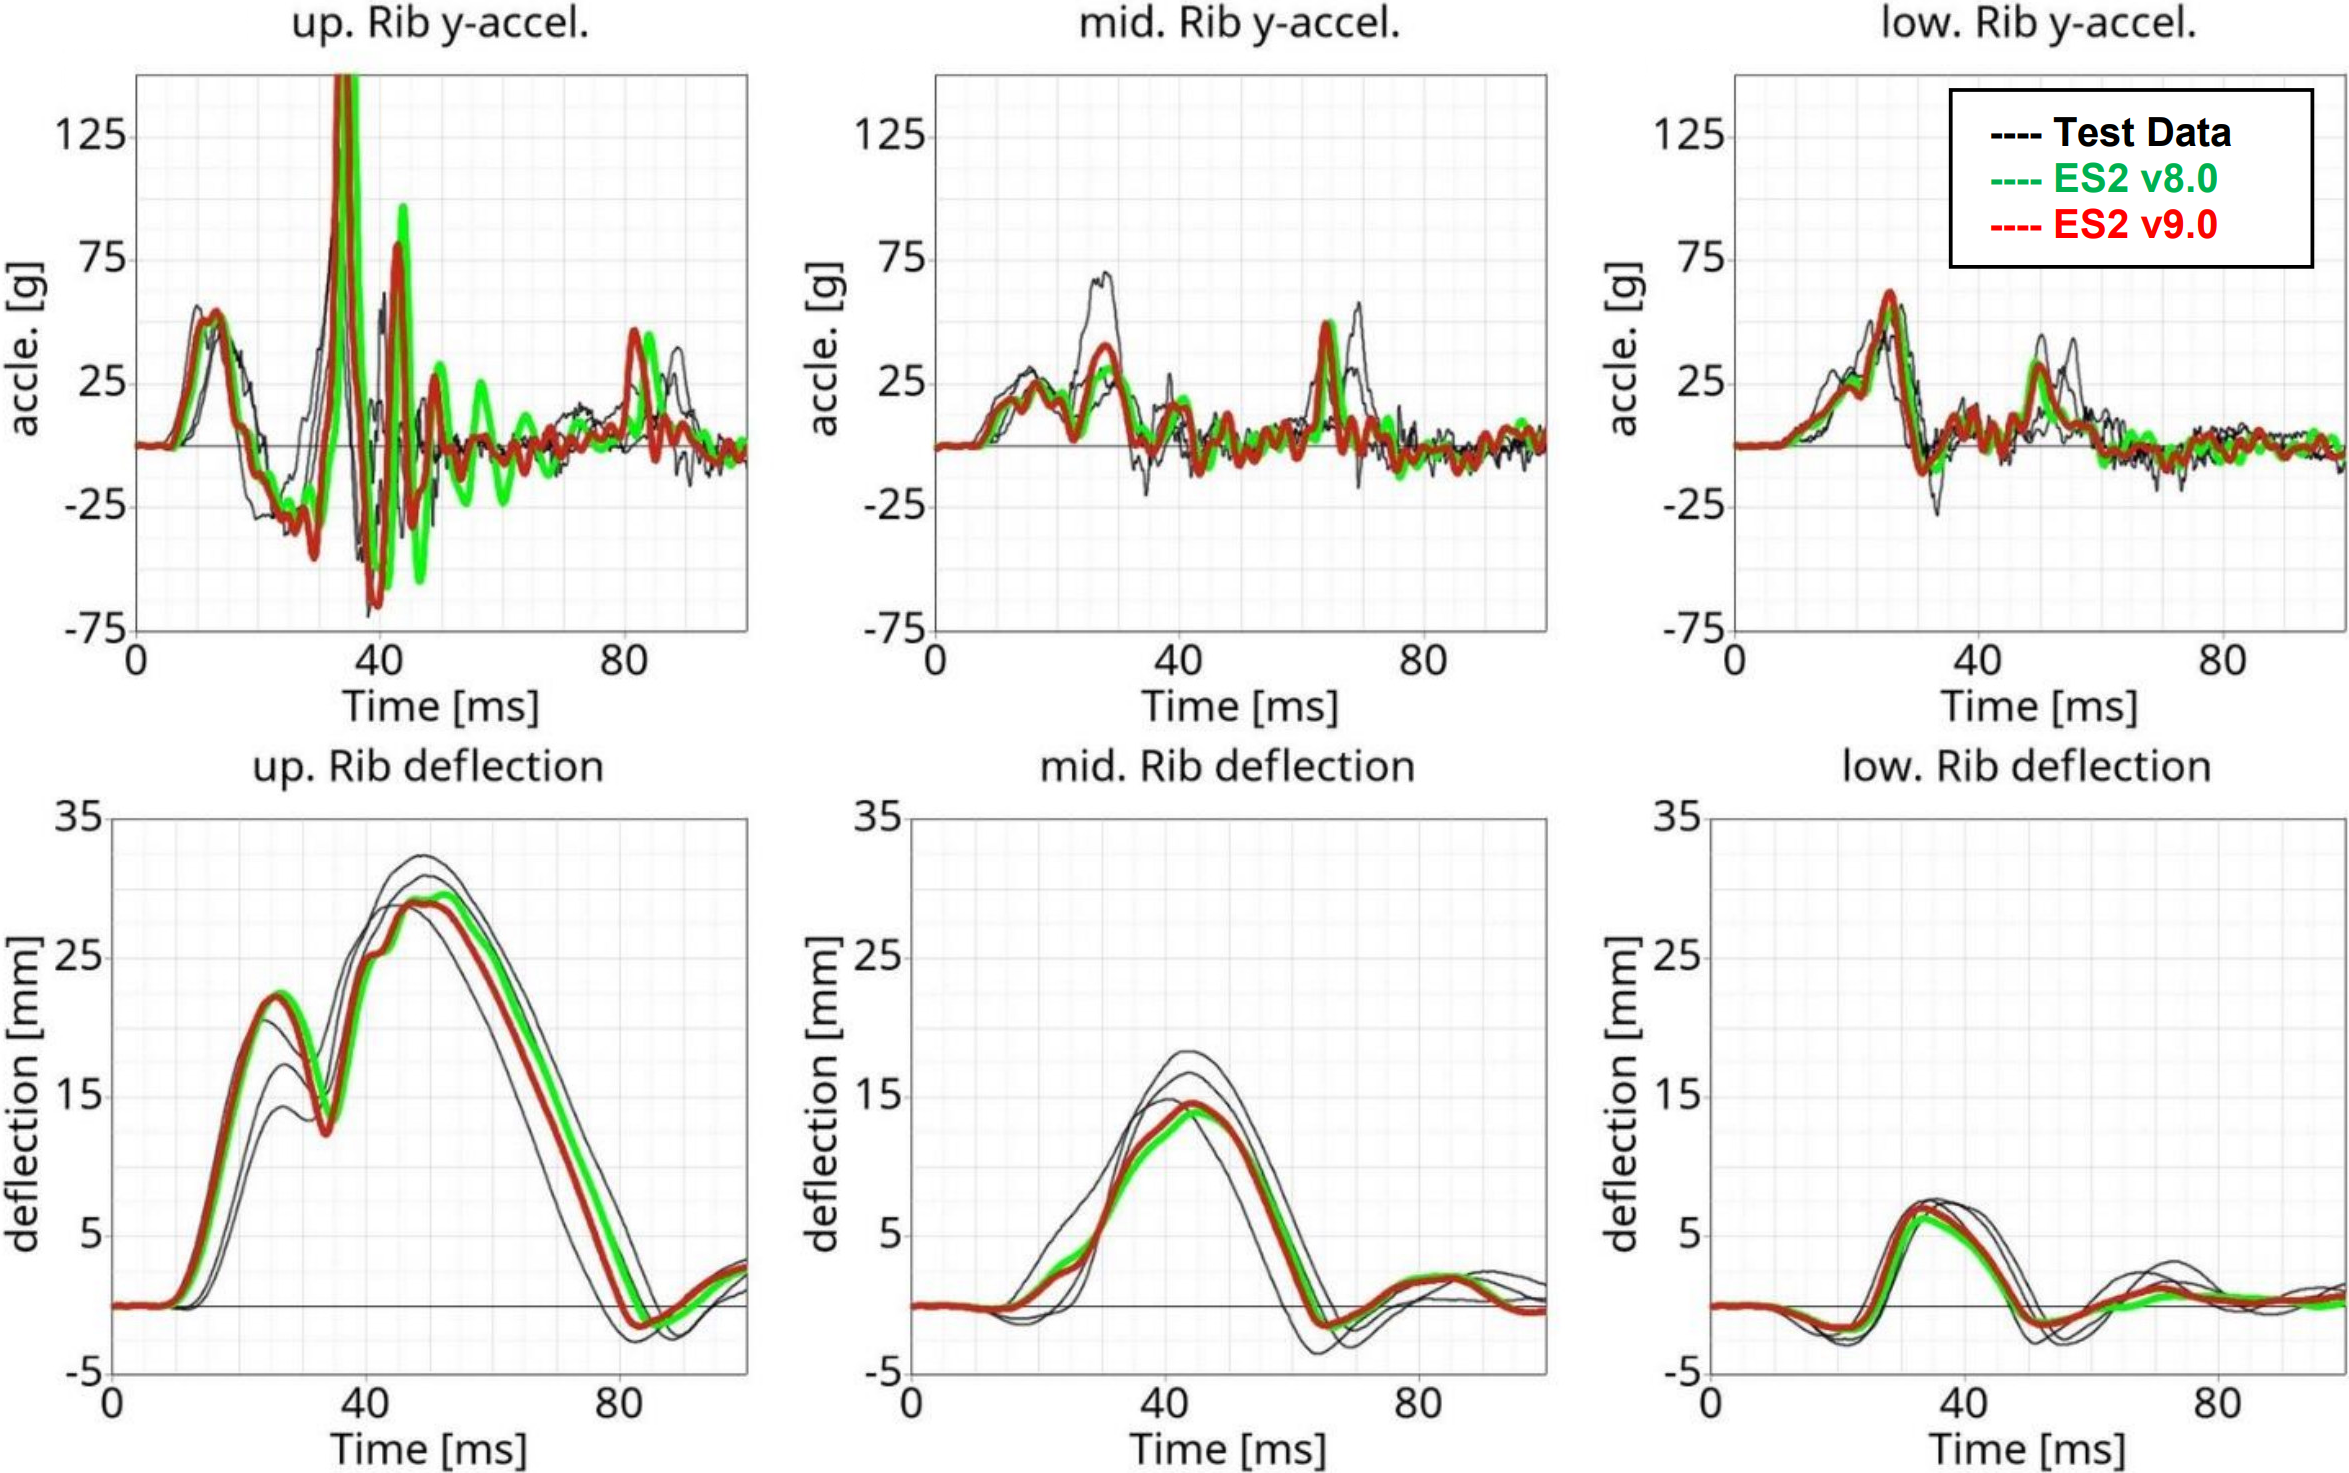
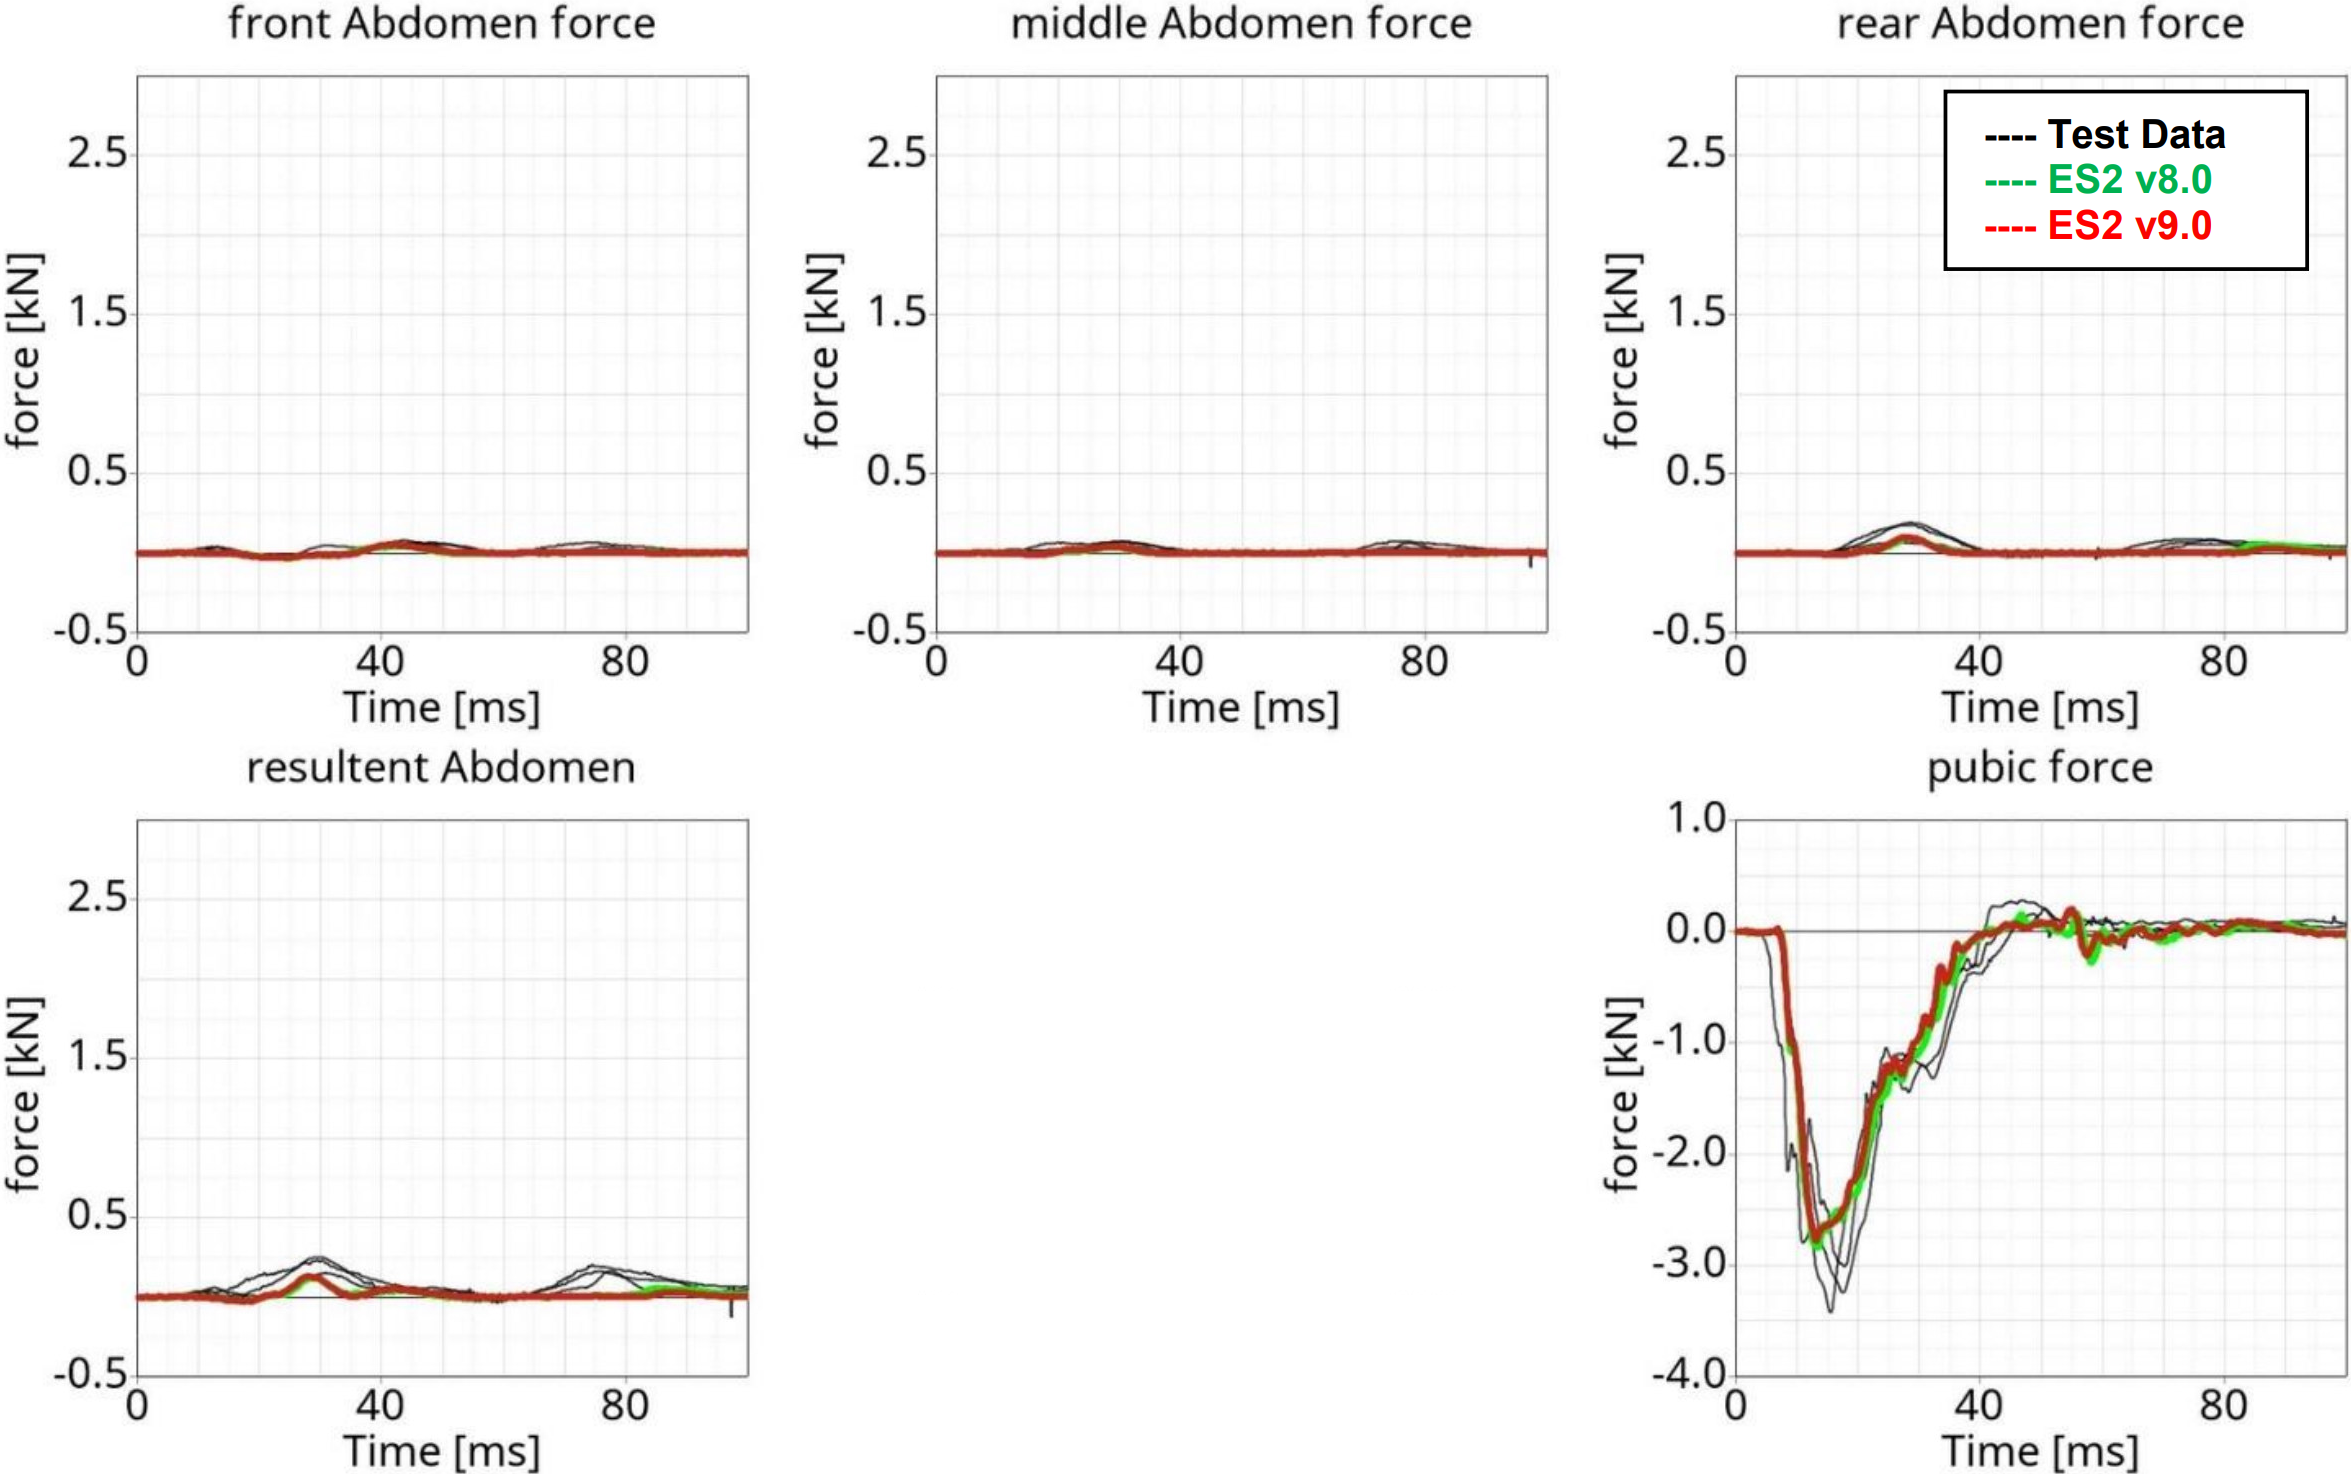
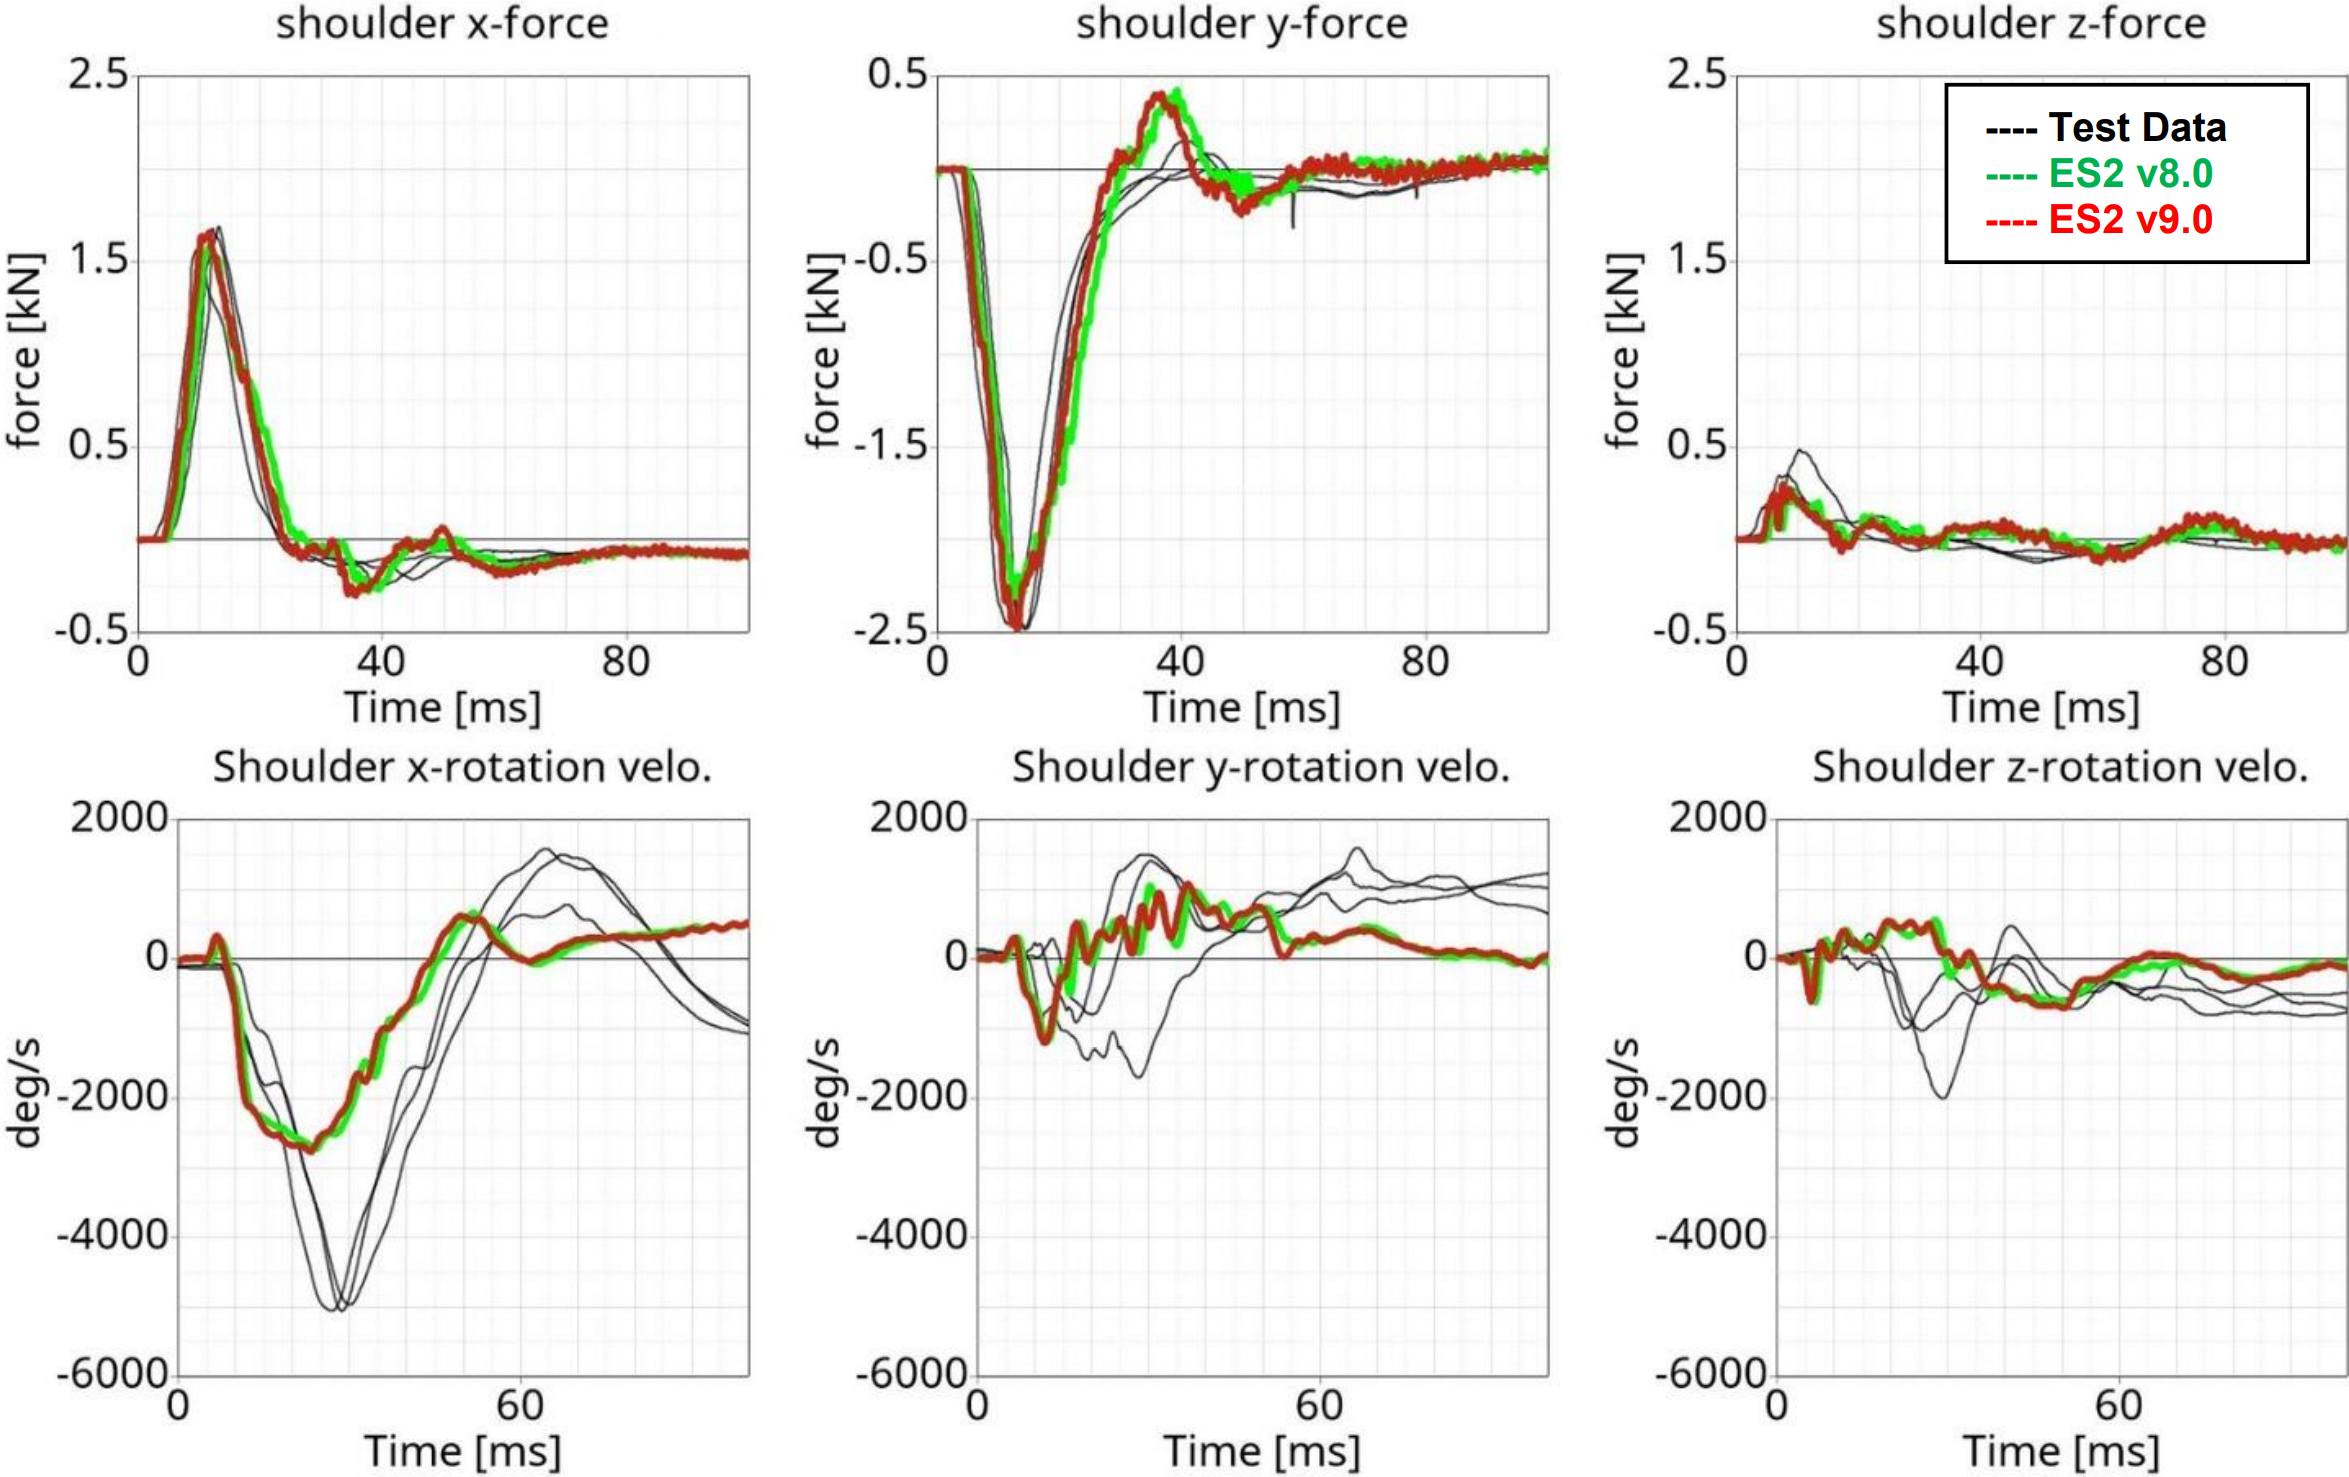
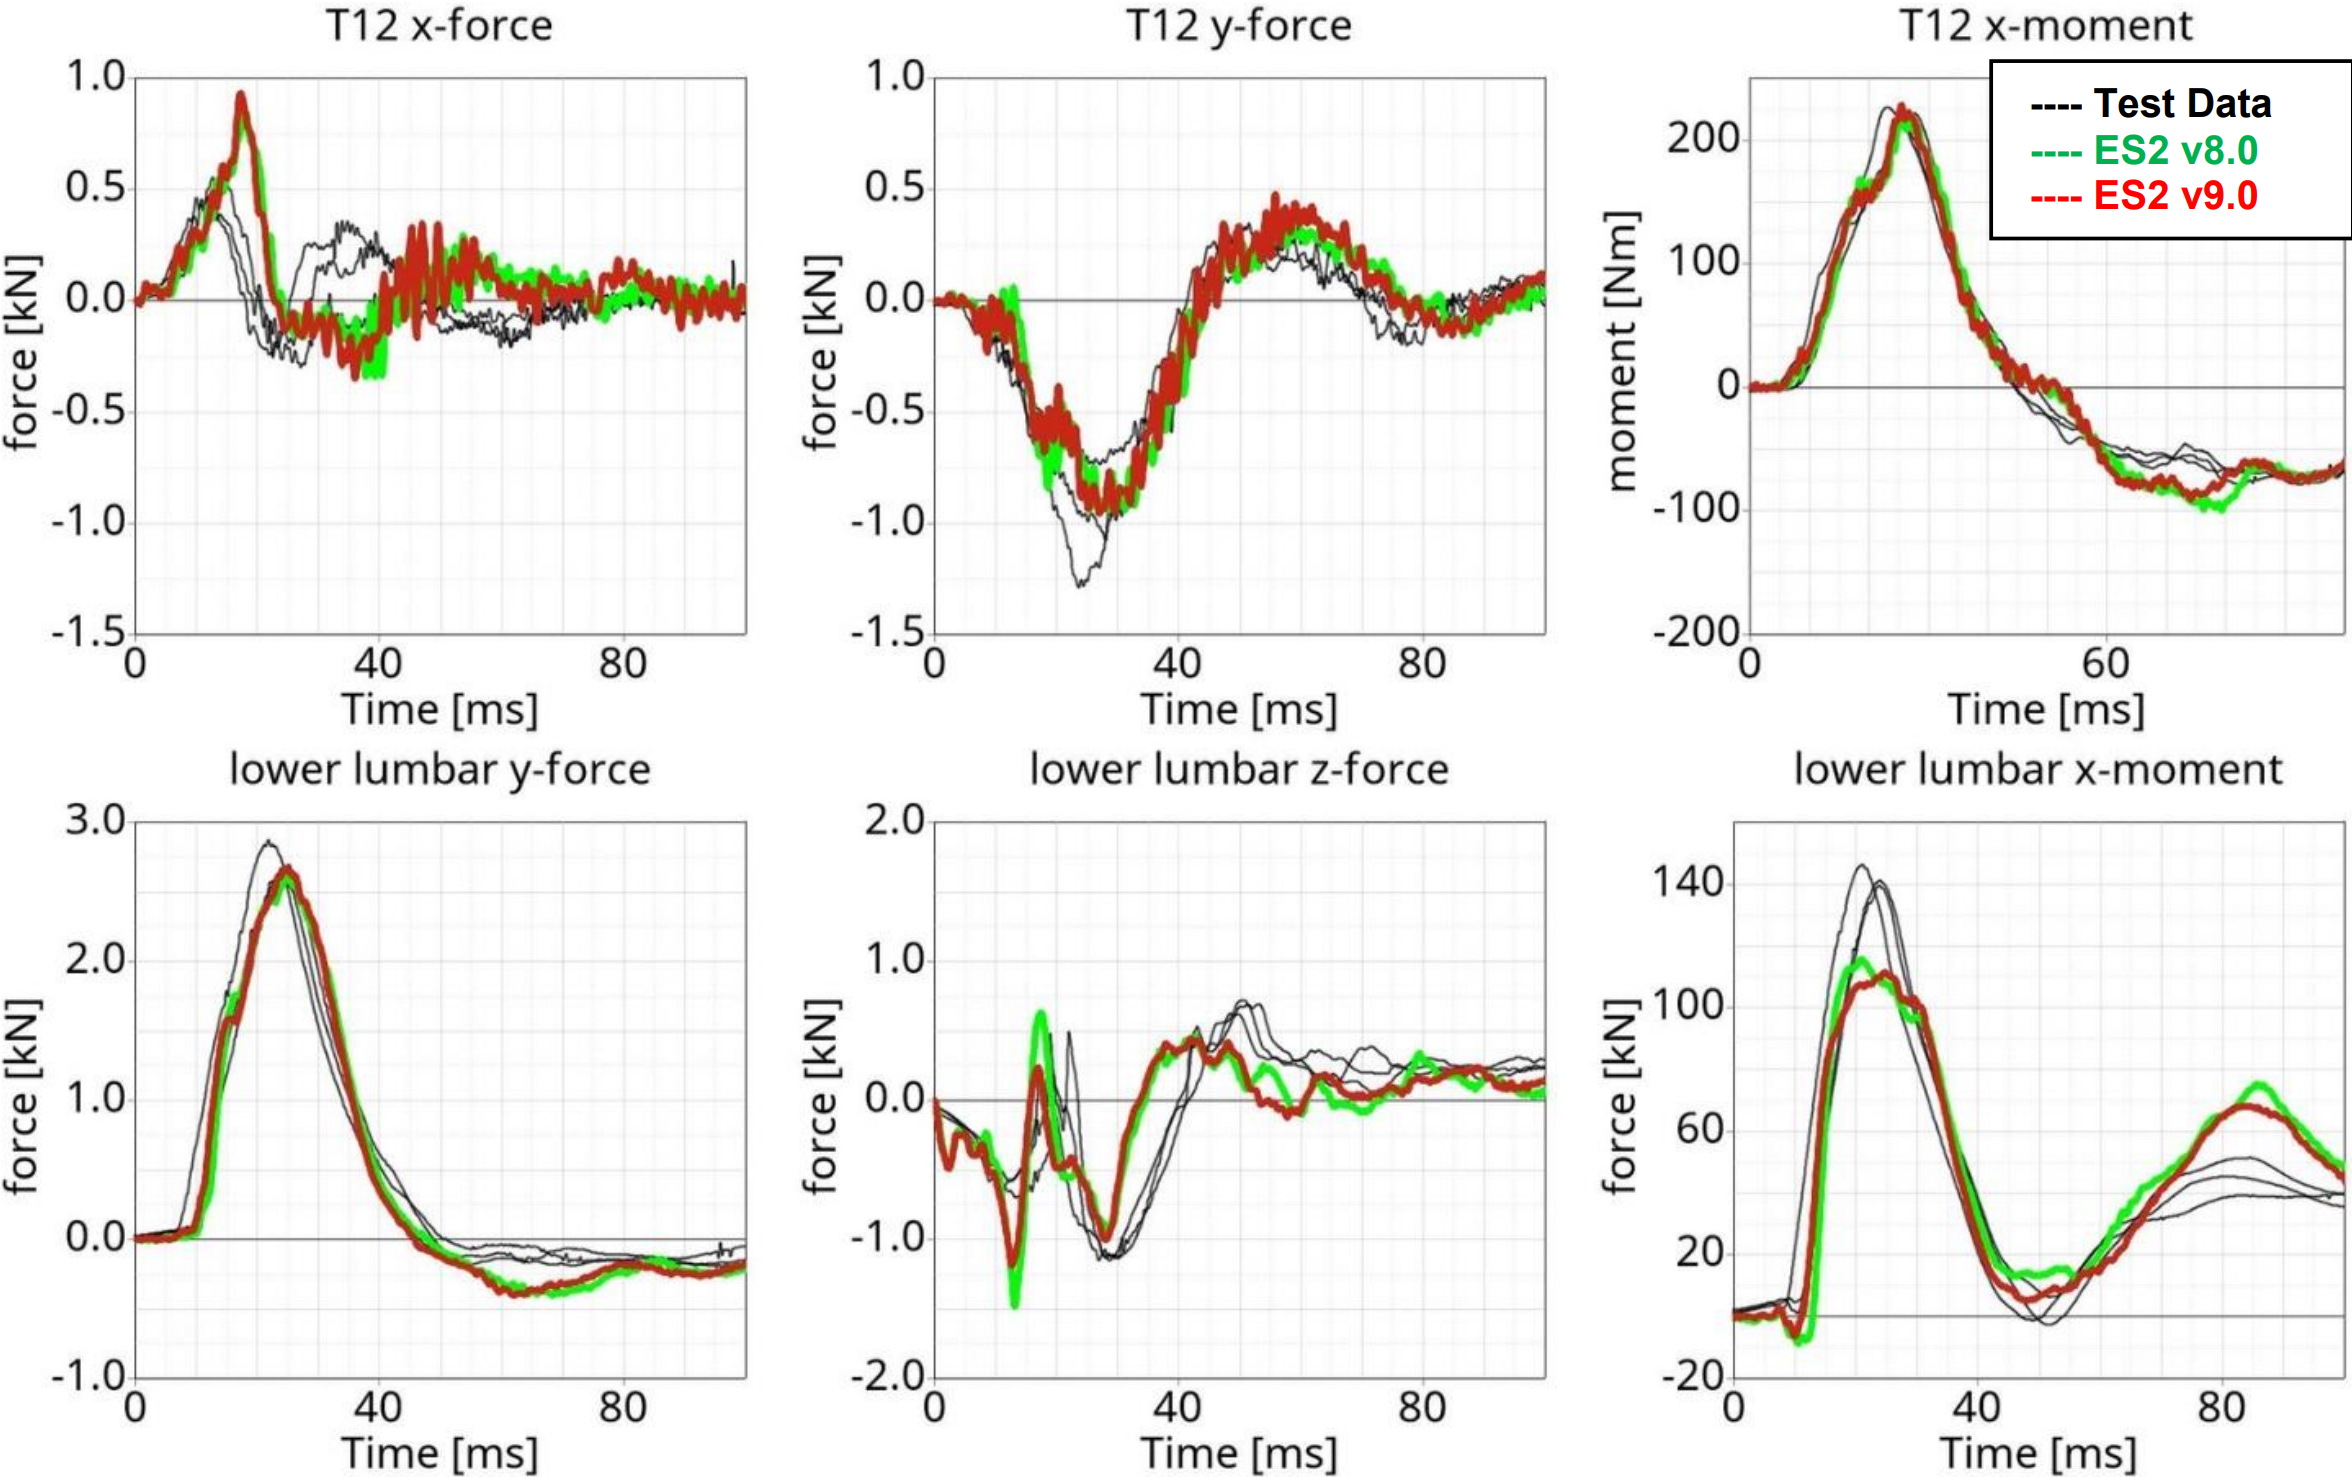
Results at high velocity impact:
