Positioning
Positioning by pre-processor
The WorldSID model is delivered with a tree file for the OASYS Primer pre-processor (may also work for ALTAIR Hypermesh, BETA CAE-Systems ANSA and LS-PrePost, not verified by DYNAmore). This allows the user to position the dummy and adjust the parts according to their degrees of freedom. The figure below shows the connections of movable parts via tree file. All revolute joints are visualized by beams.
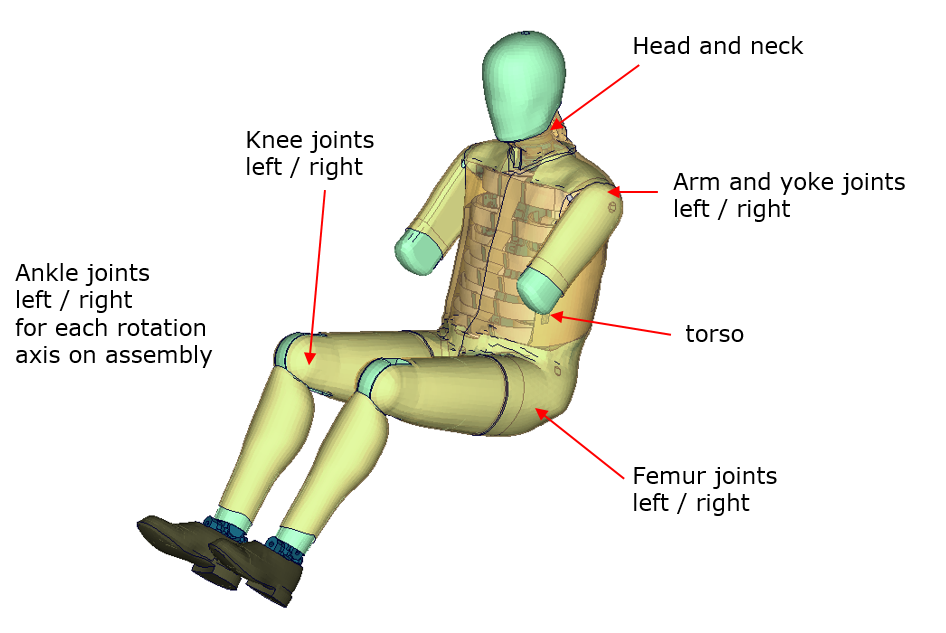
Tree-file assemblies of the WorldSID model
Two coordinate systems are modelled at the H-Point of the dummy model. These coordinate systems are connected to each other by a spherical joint. One coordinate system is constrained to global directions, which means only translations are possible, rotations are disabled. The other one is connected to the dummy, thus making it possible to measure the pelvis angle of the WorldSID during the positioning simulation quickly and easily. These coordinate systems are also used to determine the initial pelvis angle with Primer.
Movable parts and revolute joints are:
| Assembly | Stop Angles |
|---|---|
|
Foot, left and right about their ankle joints
Local z-axis
|
Stop angle: -29.0 and 29.0 degrees |
|
Lower leg, left and right about their knee joints:
Local y-axis
|
Stop angle: -0.1 and 145.0 degrees |
|
Upper leg bone, left and right about hip joint
Local x-axis
Local y-axis
Local z-axis
|
No stop angle No stop angle
No stop angle
|
| Torso | No stop angle |
| Head and neck | No stop angle |
| Upper arm | No stop angle |
| Yoke | No stop angle |
The stop angles of the feet and the knees are adjusted to the physical range of motion of the individual components.
However it might be possible that some pre-processors do not support the stop function of this tree-file structure. In this case, initial penetrations can occur if the upper legs are rotated at the hip joints beyond the values given in the table above. This reaction is based on the hardware. In the hardware, the geometry is deformed if the position of the upper leg is changed with respect to the pelvis.
The arms cannot be rotated in a pre-processor, because the jacket has to be deformed when the arms rotate. Here we recommend a pre-simulation to rotate the arm in the desired position.
The WorldSID V5.0 or high version model is also delivered with a MECHANISM in Primer for the position of 2D IR-TRACCs. This allows the user to position the 2D IR-TRACCs and adjust the parts according to their degrees and displacements freedom. This MECHANISM work for pre-processor (Primer, ALTAIR Hypermesh, BETA CAE-Systems ANSA…).
Positioning by pre-simulation
For WorldSID v4.0 DYNAmore developed a new positioning pre-simulation procedure. The basic idea was to improve and simplify the usability of the dummy model. There are only a few steps necessary to achieve a correct positioned and ready-to-run WorldSID dummy model.
For the WorldSID v5.0 DYNAmore provides a new positioning pre-simulation procedure for 2D-IR-TRACCs and optional thickness of damping material of the thorax ribs.
The procedure of positioning must be carried out strictly after the following steps:
The first step is to choose an optional thickness of damping material for the thorax rib. This can be done by changing the parameter &trd_opt. Please see the details in chapter 5.1 Release notes of WorldSID v5.0.
The second step is to adapt the posture of the dummy to your desired position besides the position of 2D-IR-TRACCs in your car by using the pre-processor of your choice. You should not take care of penetrating parts and highly distorted elements. Save this dummy model to a separate file.
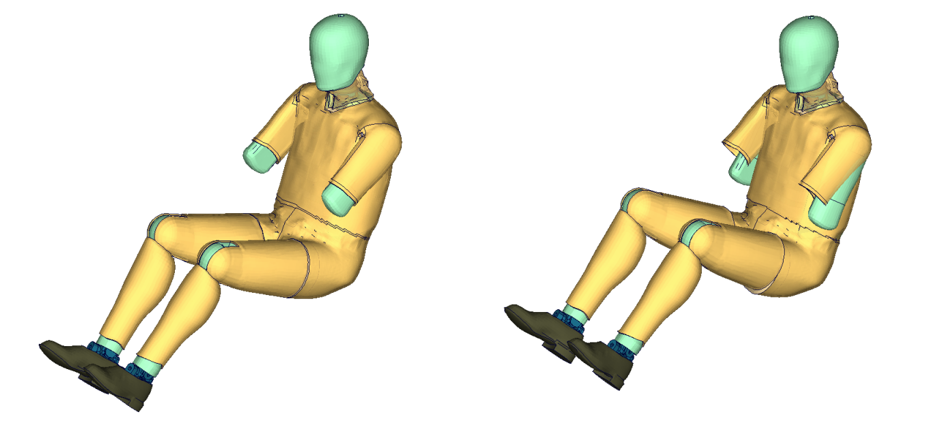
Origin (left) and target (right) position with penetrations
The third step is to run the enclosed positioning script which is included in the delivery package. The script needs the dummy model inputs of the origin (-d) and the target (-t) position.
Run: psg_vX.X_... –d dummyinput_origin.key –t target_pos_dummy.key
The script generates a pre-simulation input for LS-DYNA. This one refers to the origin dummy model input (and also the license file) as a include file.
The script is generating a BOUNDARY_PRESCRIBED_FINAL_GEOMETRY Card for the positions of Pelvis, Torso, Head/Neck and upper legs. For all other libs, there are generated spring and damper elements which pull the limbs in position.
The fourth step is to run the generated input in LS-DYNA and use the results for your actual car model or the position of 2D-IR-TRACCs as the initial geometry when there is no need to take care about the position of 2D-IR-TRACCs.
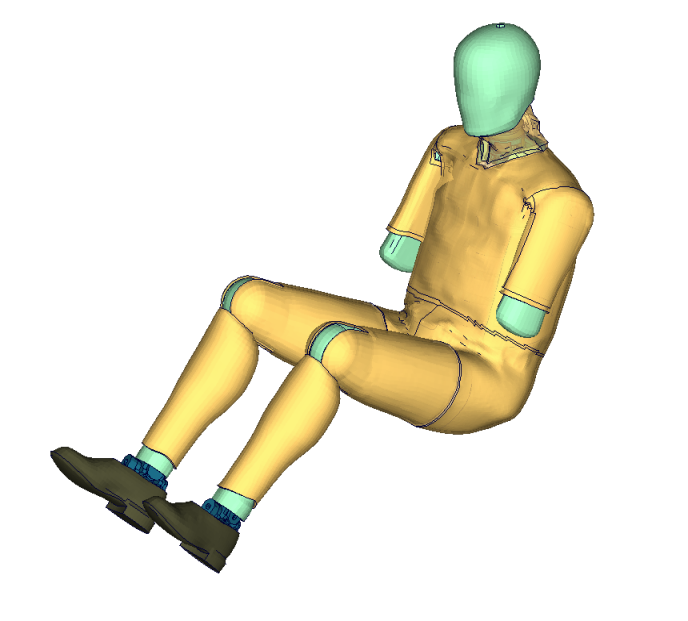
WorldSID after positioning pre-simulation part 1
The Results can be extracted by using any post-processor. Only the new nodal coordinates are needed for the new position. A very helpful tool to replace the nodal coordinates in the original input is plot2coor from the DYNAmore LS-DYNA Tools.
Since WorldSID v7.6 the IR-TRACC-positioning can also be accomplished in the second step!
The fifth step is to adapt the posture of the dummy to your desired position of 2D-IR-TRACCs in your car by using the pre-processor of your choice. Same as in the second step, you should not take care of penetrating parts and highly distorted elements. Save this dummy model also to a separate file.
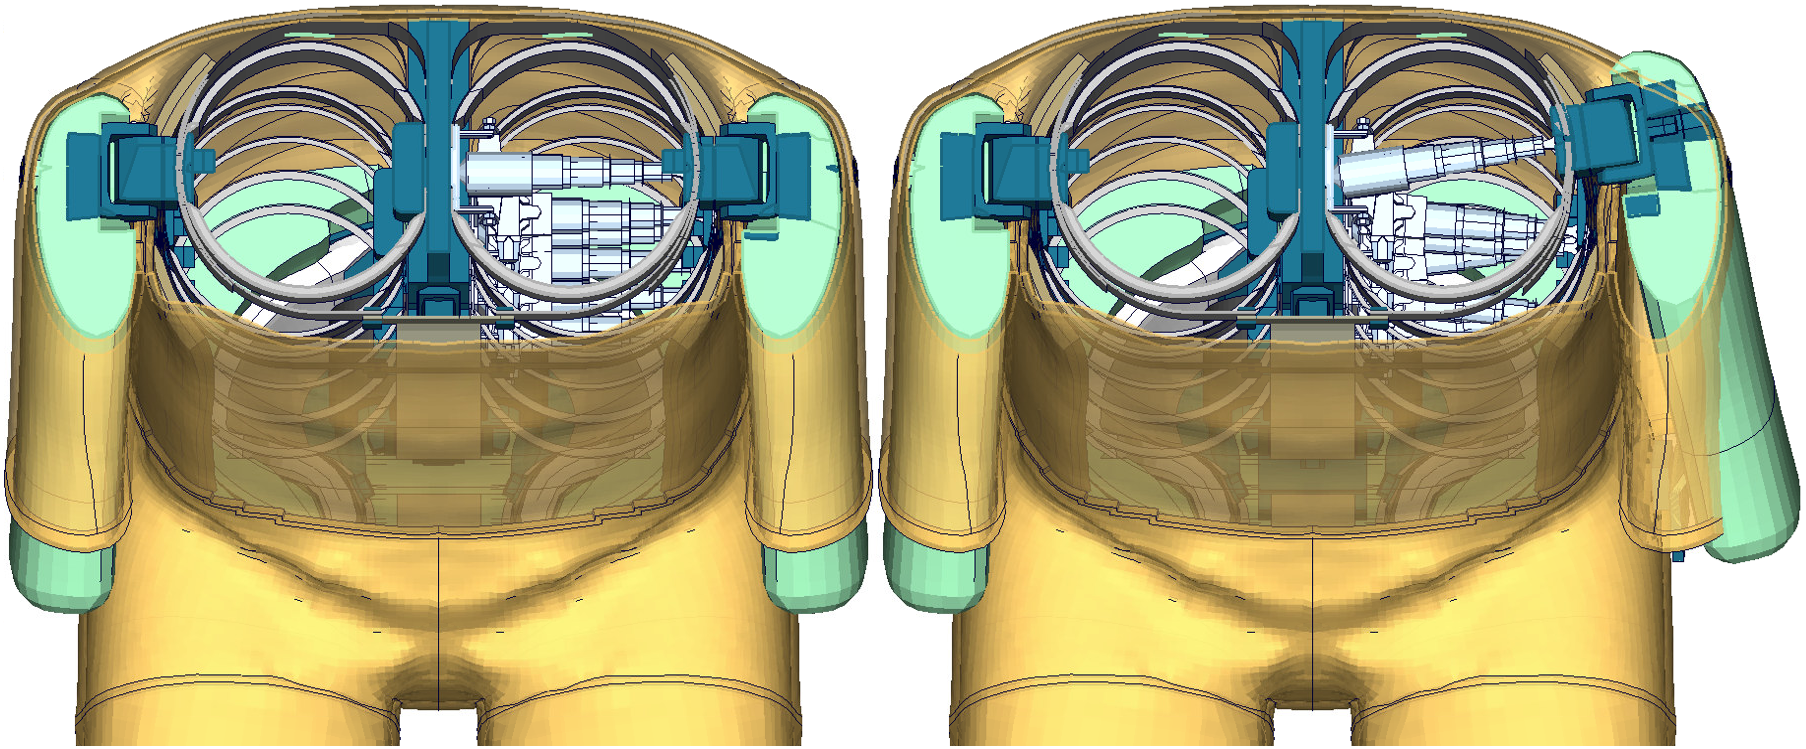
WorldSID IR-TRACCs origin (left) and target (right) position
The sixth step is to run the enclosed positioning script which is included in the delivery package. The script needs the dummy model inputs of the origin (-d) and the target (-t) position.
Run: psg_vX.X_... –d dummyinput_origin.key –t target_pos_dummy.key
The seventh step is to run the generated input from the sixth step in LS-DYNA and use the results for your actual car model as the initial geometry. Pretentions are automatically applied by reference geometry so you do not have to take care about this.
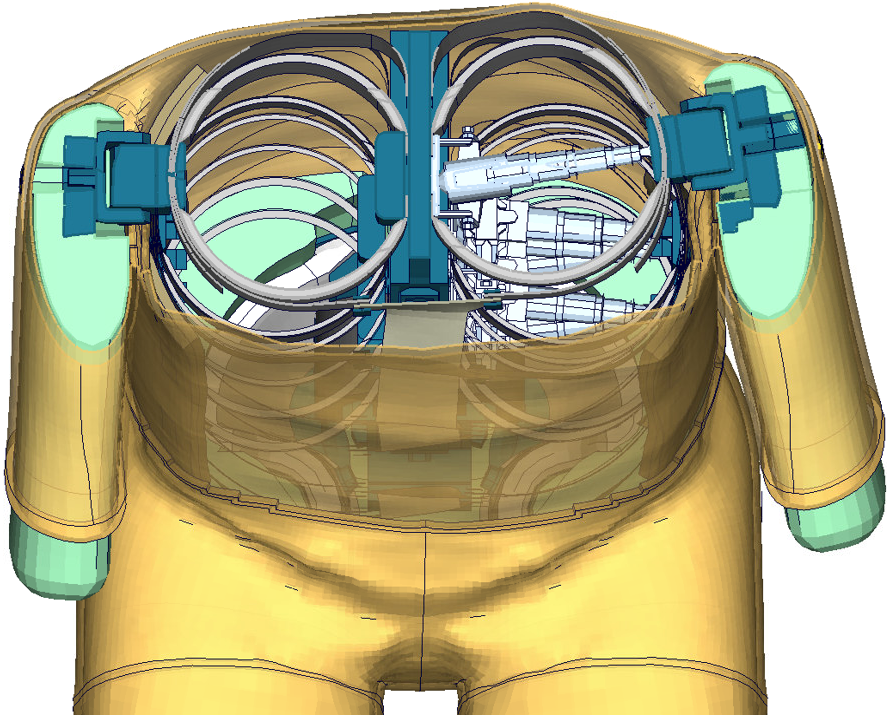
WorldSID position after 2D-IR-TRACCs pre-simulation
From Version 6.0, The thickness of thorax-rib’s damping material can be also changed after the positioning of dummy.
